5 Easy Hairstyles with Minimal Heat Damage Using Our Curling Iron
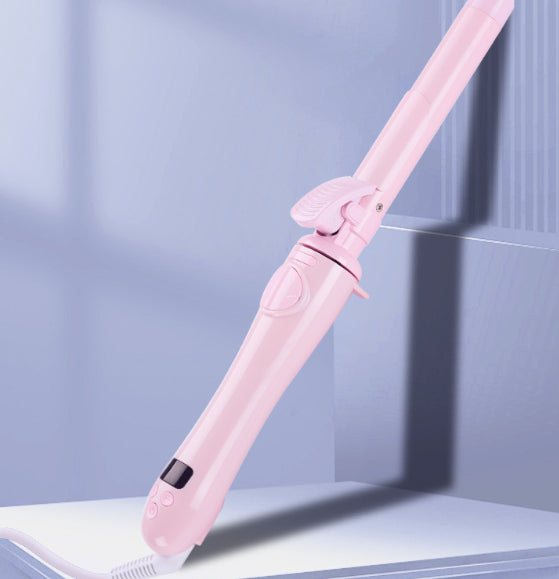
If you're looking to achieve beautiful, stylish hair while minimizing heat damage, you've come to the right place! Our Automatic Curling Iron is designed to create gorgeous curls and waves with minimal effort and damage. In this guide, we’ll walk you through five beginner-friendly hairstyles that you can easily master using our curling iron.
Why Choose an Automatic Curling Iron?
The key benefit of our automatic curling iron is its ability to distribute heat evenly, preventing hot spots that can cause damage. Plus, the automatic rotation feature takes the guesswork out of curling, meaning you spend less time applying heat to your hair. It's a great option for both beginners and those who want to protect their hair from damage.
1. Loose Beach Waves
Loose beach waves are the ultimate casual, effortless look that you can rock daily. Here’s how to achieve them:
What You Need:
- Automatic Curling Iron
- Heat protectant spray
- Light hairspray (optional)
Steps:
- Prep Your Hair: Spray a heat protectant all over your hair to shield it from potential heat damage.
- Section Your Hair: Divide your hair into two or three sections, depending on thickness.
- Curl Each Section: Starting with the bottom layer, take 1-2 inch sections of hair. Insert the end of the strand into the curling chamber of the automatic curler and let the tool do the work!
- Alternate Directions: For a more natural look, alternate the direction of the curl (some toward your face, some away).
- Shake It Out: Once your entire head is curled, gently run your fingers through your hair to loosen the waves.
- Optional Hold: Spray with light hairspray if you want the waves to last all day.
Heat Damage Tip: The automatic curling iron uses lower heat settings and curls your hair quickly, reducing exposure to prolonged heat.
2. Classic Soft Curls
For a more polished look, try classic soft curls that work for any occasion—whether you’re heading to the office or going on a date.
What You Need:
- Automatic Curling Iron
- Heat protectant
- Medium-hold hairspray
Steps:
- Protect Your Hair: As always, start by applying heat protectant to dry hair.
- Section Your Hair: Divide your hair into sections—this will help you get even curls throughout.
- Create Curls: Take a 1-inch section of hair and place the ends into the automatic curling iron. The iron will curl it automatically for you.
- Work Through All Sections: Repeat for the entire head. Let the curls cool before you touch them.
- Optional: After cooling, you can gently brush through the curls for a softer, more romantic look.
- Lock in the Style: Spray medium-hold hairspray to keep the curls intact.
Heat Damage Tip: Keep the curling iron on the lower heat setting if your hair is fine or damaged.
3. Tight Curls for Volume
Tight curls can add lots of volume and texture to your hair. Here’s how to get bouncy curls with our automatic curling iron:
What You Need:
- Automatic Curling Iron
- Volumizing mousse (optional)
- Heat protectant spray
Steps:
- Prep Your Hair: Start with a heat protectant and apply volumizing mousse to damp hair if you want extra body.
- Section Your Hair: Work with small sections (about ½ to 1 inch wide) to achieve tighter curls.
- Curl Each Section: Feed each small section of hair into the curling iron, and let it create the curl.
- Repeat Around Your Head: Work through all sections until your entire head is full of tight curls.
- Let Them Cool: Allow your curls to fully cool before you touch them for long-lasting hold.
Heat Damage Tip: Our curling iron has adjustable settings, so use the lowest effective heat setting for your hair type.
4. Loose Waves with Straight Ends
This trendy look is perfect for adding texture while keeping your ends sleek and straight. It’s ideal for a laid-back yet polished vibe.
What You Need:
- Automatic Curling Iron
- Heat protectant spray
- Finishing serum
Steps:
- Prep Hair: Spray heat protectant to your dry hair.
- Section Hair: Part your hair into two sections (upper and lower) for easy styling.
- Create Waves: Begin curling the mid-lengths of each section of hair, but leave the ends out of the curler. This will keep the ends straight for a cool, modern look.
- Continue Around Your Head: Repeat for all sections, alternating the direction of the curl for a more relaxed wave.
- Finish the Look: Add a little finishing serum to smooth the straight ends and give your hair a sleek shine.
Heat Damage Tip: Curling only the mid-lengths reduces the amount of heat applied to your hair, further preventing damage.
5. Elegant Half-Up Curls
This hairstyle is perfect for special occasions or when you want to elevate your everyday look.
What You Need:
- Automatic Curling Iron
- Hair tie or clip
- Hairspray (optional)
Steps:
- Prep Your Hair: Use heat protectant spray before styling.
- Section the Top Half of Your Hair: Pull back the top half of your hair and secure it with a clip or hair tie.
- Curl the Bottom Section: Take small sections from the bottom layer and curl them using the automatic curling iron.
- Release the Top Section: Once you’ve curled the bottom, let down the top half and curl it as well.
- Optional Finishing Touches: You can pin some of the curls for a more elegant updo or leave them loose for a softer look.
- Set with Hairspray: If desired, finish with a light mist of hairspray to lock in the style.
Heat Damage Tip: The automatic curling iron is great for creating consistent curls without having to hold each strand for too long, reducing the risk of overheating your hair.
Final Thoughts
With these five easy hairstyles, you can switch up your look while keeping your hair healthy. Our Automatic Curling Iron makes it simple to create beautiful, long-lasting curls with minimal heat damage. Whether you’re looking for loose waves, tight curls, or elegant styles, you can achieve all of these looks effortlessly and without fear of damaging your hair.
Ready to Get Started?
Try one of these styles today and experience the difference with our Automatic Curling Iron. Your hair will thank you!
