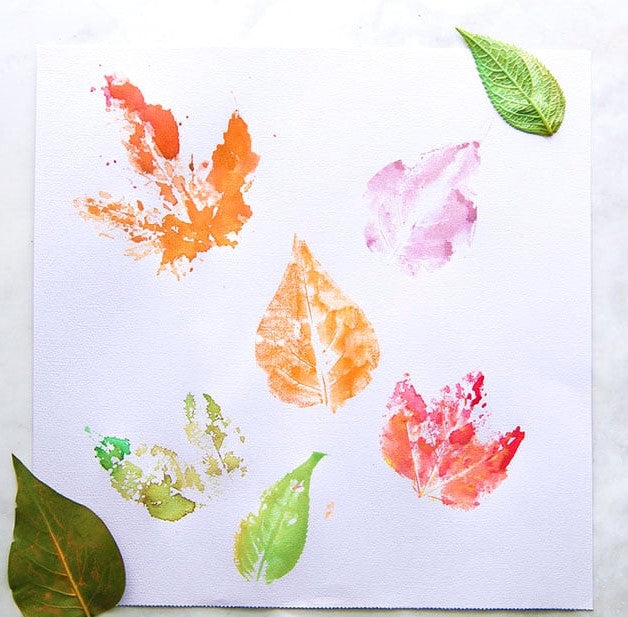
DIY Project: Create Your Own Nature-Inspired Leaf Print Art
Looking for a fun and creative activity to enjoy with your family? Dive into the world of DIY with this nature-inspired leaf print art project! Perfect for adults and children alike, this activity combines the beauty of nature with the joy of artistic expression. Let's get started!
Materials You'll Need:
- Various fresh leaves (e.g., maple, oak, fern)
- Acrylic paints (assorted colors)
- Paintbrushes (various sizes)
- White cardstock or canvas boards
- Paper towels
- Water cup
- Optional: markers, glitter, or other embellishments
Step 1: Collect Your Leaves
Head outdoors with your family and explore your surroundings to gather a variety of leaves. Look for leaves with interesting shapes, textures, and sizes. Make sure they are fresh and pliable for the best results.
Step 2: Prepare Your Workspace
Cover your work area with newspaper or a disposable tablecloth to protect it from paint spills. Place your white cardstock or canvas boards on the protected surface.
Step 3: Apply Paint to Leaves
Squeeze a small amount of acrylic paint onto a paper plate or palette. Use a paintbrush to apply an even layer of paint onto the underside of each leaf. Encourage creativity by mixing and blending colors to create unique designs.
Step 4: Press Leaves onto Paper
Carefully flip the painted leaves over and position them onto the cardstock or canvas boards. Gently press down on each leaf to transfer the paint onto the paper. Experiment with different arrangements and overlapping leaves to create interesting patterns.
Step 5: Remove Leaves
Once you're satisfied with your leaf prints, carefully lift and remove the leaves from the paper. Use a paper towel to blot any excess paint or moisture from the surface of the paper.
Step 6: Add Personal Touches (Optional)
Get creative and add your own personal touches to the leaf prints! Use markers to outline or embellish the prints, or sprinkle glitter for a touch of sparkle. Let your imagination run wild!
Step 7: Let Dry and Display
Allow your leaf print art to dry completely before handling or displaying. Once dry, showcase your masterpieces in frames or simply hang them on the wall to admire. Celebrate your creativity and the beauty of nature!
Tips for Success:
- Experiment with different types of leaves and paint colors to create diverse designs.
- Encourage children to explore their creativity by mixing and matching colors and arranging leaves in unique patterns.
- Use a light touch when pressing down on the leaves to avoid smudging the prints.
- Consider incorporating your leaf print art into other craft projects, such as greeting cards or handmade journals.
Let Your Creativity Blossom!
Unleash your inner artist and bond with your loved ones as you create beautiful leaf print art together. This simple yet rewarding DIY project is a wonderful way to connect with nature and nurture your creativity. So gather your supplies, head outside, and let your imagination take flight!
Happy crafting! 🍃🎨 #DIYProject #LeafPrintArt #FamilyCrafts #NatureInspiredArt #CreativeFun #NayniesTreasures
